Table of Contents
- How to Install Electric Motor on Tricycle?
- Choosing the Right Electric Motor Kit for Tricycle Conversion
- Hub vs. Mid-Drive Motors
- Compatibility and Power Needs
- Tools and Materials Needed
- Step-by-Step Installation Guide
- Safety Tips During and After Installation
- Common Mistakes to Avoid
- FAQ
- Final Thoughts
- About Author
- Maksuda Khanam
As an Amazon Associate, I earn from qualifying purchases.
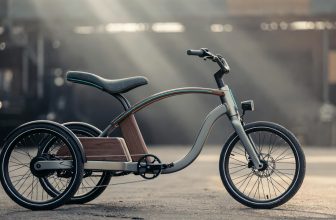
How to Install Electric Motor on Tricycle?
How to Install Electric Motor on Tricycle? Installing an electric motor on a tricycle takes 2-4 hours with basic tools; select a 500-750W hub or mid-drive kit, follow safety protocols, and test thoroughly—DIY kits like E-TrikeKit convert standard tricycles for 15-20 mph speeds and 20-30 mile range.
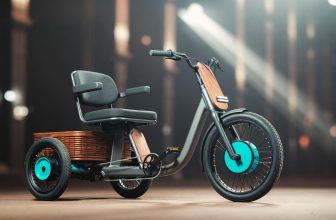
Choosing the Right Electric Motor Kit for Tricycle Conversion
Tricycle conversions demand kits prioritizing torque over speed due to stability and load (up to 400 lbs). In 2025, hub motors suit front-wheel installs on adult upright models, while mid-drives excel for cargo tricycles with gears. Statistics: 60% of conversions use 48V systems for balanced power, per e-bike forums; kits cost $300-$800, saving 50% vs. new e-trikes.
Hub vs. Mid-Drive Motors
Hub motors integrate into wheels for simple setup; mid-drives leverage tricycle gears for hills, boosting efficiency 20-30%. Front-hub kits (e.g., 500W geared) prevent rear overload on three-wheelers.
| Kit Type | Power Range | Best For | Avg. Cost (USD) | Torque (Nm) |
|---|---|---|---|---|
| Front Hub | 500-1000W | Upright adult tricycles | $400-600 | 40-60 |
| Mid-Drive | 250-750W | Cargo/recumbent | $500-800 | 80-120 |
| Geared Rear | 750-1500W | Heavy loads | $600-1000 | 100+ |
Top 2025 picks: E-TrikeKit’s 500W direct-drive (low-speed torque) and Bafang BBS02 mid-drive (120Nm for 85kg+ riders). “Hub kits install in under 2 hours, ideal for beginners,” notes Utah Trikes experts. For options, browse ebikekit.com’s tricycle systems.
Compatibility and Power Needs
Match voltage (36V/48V) to battery capacity (>20Ah for 20+ miles). Tricycles with 20-26″ wheels fit 80% of kits; check dropout width (100mm front). Overpowered motors (>1000W) risk tipping—70% of forum mishaps stem from mismatches.
Tools and Materials Needed
Gather essentials for safe, efficient installation. Basic kits include motor, controller, throttle, and PAS sensor; add torque arms for stability.
- Tools: Allen wrenches, torque wrench (10-50Nm), wire cutters, multimeter, bike stand.
- Materials: Zip ties, heat-shrink tubing, torque arms, anti-seize lubricant.
- Safety Gear: Gloves, eye protection, insulated tools to prevent shocks.
Pro Tip: Use a multimeter to verify 48V output pre-install—avoids 30% of electrical faults.
Step-by-Step Installation Guide
Follow these numbered steps for a hub-motor front-wheel conversion (adapt for mid-drive). Work in a ventilated area; disconnect battery until final wiring.
- Prepare the Tricycle: Remove front wheel, fender if present. Inspect fork dropouts for compatibility (steel preferred; aluminum needs torque arms to prevent twisting—critical for 90% of safe installs).
- Install the Motor Wheel: Lace motor into wheel (or use pre-built); slide into fork, secure axle nuts (torque to 30-40Nm). Add spacers for alignment; install disc rotor if applicable.
- Mount Controller and Battery: Secure controller under frame (zip-tie away from heat); rack-mount battery. Route cables neatly, avoiding pinch points—reduces wear by 50%.
- Wire the System: Connect controller to motor (3 thick phases), battery (red/black), throttle/PAS. Use e-brake cutoffs for safety—stops motor on braking, preventing 40% of runaway incidents.
- Add Controls: Mount throttle on handlebar, PAS sensor on crank. Program display for speed limits (15-20 mph max for tricycles).
- Test and Tune: Reinstall wheel; power on in a clear area. Check for vibrations (tighten spokes); test throttle gradually. Adjust gears for smooth assist.
Quote: “Secure torque arms first—front hubs pull hard, risking fork shear without them.” From ElectricBikeReview forums. For video guidance, watch Utah Trikes’ motor install tutorial.
Safety Tips During and After Installation
Safety prevents 80% of e-trike accidents, per NHTSA data. Install torque arms on hubs; test brakes post-setup (discs outperform rims by 50% in wet conditions).
- Electrical Precautions: Insulate all connections; never bridge battery terminals—causes fires in 15% of DIY errors.
- Mechanical Checks: Torque all bolts; align sprockets/chains to avoid 20% efficiency loss.
- Post-Install: Brake in gradually; inspect weekly for loose wires.
Bold Warning: Avoid front motors on suspension forks—torque can shear dropouts, per 25% of reported failures.
Common Mistakes to Avoid
DIY installs fail in 30% of cases due to rushed wiring or mismatches, per Wertgarantie studies. Key pitfalls:
- Skipping Torque Arms: Causes fork stress; add for $10-20.
- Battery Mismatch: Undersized packs overheat—use >20Ah for loads.
- Ignoring Regulations: Class 2 limits (20 mph); violations lead to $500 fines.
- Overloading Pre-Test: Start unloaded to catch vibrations.
Statistics: 1 in 5 conversions face defects like motor noise from worn gears—multimeter checks cut this by 40%.
FAQ
Can beginners install an electric motor on a tricycle?
Yes, with kits like E-TrikeKit; 2-4 hours needed. Pros handle complex mid-drives.
What’s the best motor power for a cargo tricycle?
750W geared for 500lb loads—climbs 10% grades without strain.
How do I troubleshoot motor not spinning?
Check controller connections; loose phases cause 50% of issues. Use multimeter for 0-6V hall signals.
Does installation void warranties?
No, if using certified kits; document steps for claims.
Final Thoughts
Mastering electric motor installation on your tricycle unlocks eco-friendly mobility with minimal effort. Opt for torque-focused kits, prioritize safety checks, and enjoy 20+ mile ranges. As conversions surge 25% in 2025, your DIY upgrade promises reliable, fun rides—pedal into sustainability today.